
How to Apply Iron On Patches: The Complete 2026 Guide
Iron-on patches are one of the easiest ways to personalise clothing or give old garments a fresh look. And the best part is that applying an iron-on patch doesn’t require professional equipment or advanced sewing skills.
The process is simple, but only when you are well prepared for it. When learning how to apply iron on patches, using the wrong temperature or applying heat for too long can affect both the patch and the fabric underneath. On the other hand, following a few simple steps can help your patch stay securely attached for years.
Keep reading to find out everything you need to know about the process, from choosing the right fabric to looking after your patch once it’s applied.
The Iron-On Patch Attachment Process
Here is how you need to handle your patches and stick them securely on your clothing.
Check Whether the Fabric Is Suitable
Not every material will respond happily to the heat required for iron-on patches.
Any one of these can be considered the best fabric for iron on patches:
- Cotton
- Denim
- Canvas
- Cotton blends
Some materials will require extra care or may not be suitable at all.
You should also avoid applying iron-on patches directly to fabrics such as nylon, leather, silk and polyester that can’t tolerate high heat.
Make sure to check the garment’s care label first. It’s usually better to sew the patch on instead if the fabric is specifically advised against ironing.
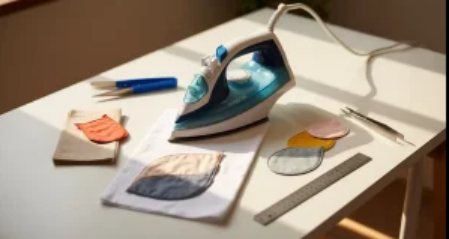
What You’ll Need
Gather everything in one place before you begin.
You’ll need:
- An iron with adjustable heat settings
- A clean cotton cloth
- An ironing board
- Your iron-on patch
- The garment or fabric item
- A pair of scissors if trimming is required
Switch off your iron before starting if it has a steam setting, as steam can interfere with the adhesive and reduce the strength of the bond.
Prepare the Garment
A clean surface will offer the adhesive the best chance of bonding properly. Start by washing or drying the garment if needed, and then smooth out any wrinkles with the iron.
Next, lay the clothing on a firm and flat surface. Try using a stable ironing board because it will allow even pressure across the patch.
Position the Patch Carefully
Decide where the patch should sit before applying any sort of heat.
Take a moment to check:
- Is it centred?
- Does it avoid seams, pockets, or zips?
- Is it straight?
- Will it still look balanced when the garment is being worn?
Make sure to get the position right from the beginning because once the adhesive begins to melt, moving the patch will become even more difficult.
Set the Correct Iron Temperature
Always read the iron on patch guide supplied by the manufacturer, as each patch type follows specific kinds of instructions.
A medium-to-high heat setting suitable for cotton works well in most of the cases.
Remember:
- Turn the steam function off
- Allow the iron to reach the correct temperature before applying it
- Never place the hot iron directly onto delicate fabrics without protection
Protect the Patch Before Ironing
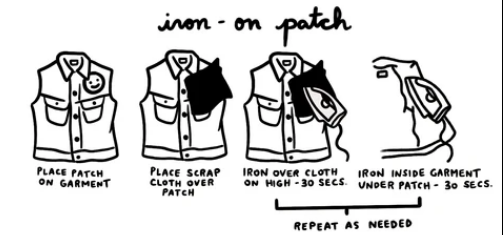
Place a clean cotton cloth or a sheet of baking paper over the patch.
This creates a protective barrier that helps prevent:
- Scorch marks
- Damage to embroidered threads
- Excessive heat on delicate materials
Press the iron firmly onto the patch when the cloth is in place.
Avoid sliding the iron backwards and forwards as you would when ironing clothes. Instead, apply steady pressure for around 20–30 seconds, depending on the manufacturer’s instructions.
Firm pressure usually works better than constant movement because it allows the adhesive to melt evenly across the backing.
Check That the Patch Has Bonded Properly
Leave the patch to cool for a minute or two before touching it once you have finished ironing.
Carefully check the edges.
If any corner begins to lift, don’t pull it away. Just place the protective cloth back over the patch and apply the iron again for another 10–15 seconds. Repeat this until every edge is securely attached.
Taking an extra minute at this stage can prevent the patch from peeling after a few washes.
Iron from the Reverse Side (If Possible)
Turning the item inside out can improve the bond for thicker garments such as denim jackets and canvas bags.
Place the iron on the reverse side of the fabric for another 15–20 seconds. Heating both sides helps the adhesive spread more evenly through the fibres, which creates a stronger attachment.
This step isn’t always possible with every item, but it’s worth doing whenever the fabric allows!
Common Mistakes To Avoid While Applying
Applying custom embroidered patches Australia or any other patches through the iron-on method is very easy, but a few common mistakes can affect the final result.
Using Steam
Steam creates moisture between the adhesive and the fabric, which makes it harder for the glue to bond properly.
Always switch the steam function off before you begin.
Choosing the Wrong Temperature
An iron that’s too cool may not activate the adhesive, while excessive heat can damage both the patch and the garment.
Make sure to follow the recommended heat setting whenever possible.
Ironing Over Seams
Pressure won’t be distributed evenly if part of the patch sits across a thick seam or pocket edge.
Try to choose a flat section of fabric.
Wearing the Garment Immediately
Give the adhesive enough time to cool completely before wearing or folding the item, as allowing it to set properly will help create a stronger bond.
FAQS
How long do iron-on patches usually last?
A carefully applied iron-on patch on a suitable fabric can easily last for years when you take care of it properly. Some extra measures, such as washing garments inside out and avoiding high temperatures, can also contribute to its longevity.
Can I apply an iron-on patch without an ironing board?
Yes. Any firm and heat-resistant surface that allows you to apply steady pressure with the iron can work. Just make sure to avoid soft and uneven surfaces as they can prevent the adhesive from bonding properly.
Should I sew around an iron-on patch after applying it?
Ironing is enough if your patch is attached to everyday clothing, but stitching around the edges can provide additional security if your fabric will undergo frequent washes and harsh outdoor conditions.
Key Takeaways
Iron-on patches offer a quick and practical way to repair clothing and add a hint of your personality to the clothing. Just be mindful of fabric considerations and follow the patch manufacturer’s instructions to achieve a secure and long-lasting finish from the Iron On Patches Australia you have ordered with so much excitement!

I am Kelly James, and I enjoy helping people by providing them with clear and meaningful writing. I love creating content that is easy to read, informative, and engaging. Whether I am working on articles, blog posts, or website content, I always focus on making sure every piece connects with the reader. I am always learning, exploring new ideas, and finding better ways to tell stories that people enjoy reading.